Thursday, March 14, 2019

LOD JL Signature Series Shorty Bumper Install


So this is probably about the 6th or 7th bumper that I have installed over time and I think this had the worst directions of any including the used ARB bumper that had no directions. Now I liked everything else about the bumper and the install but just had to call out that some of the directions were just wrong or missing. It was odd to see and in some places, we just made our best guess.

Scoring for the Bumper install comes out to a 12 out of 15 so pretty good:

     Price - 2 ($621.24)
     Completeness of Directions - 2
     Completeness of parts/materials - 2
     Ease of Installation - 3
     Final Product - 3

Scoring for the Skid Plate install comes out to a 14 out of 15 so it's the best so far:

     Price - 2 ($119.99)
     Completeness of Directions - 3
     Completeness of parts/materials - 3
     Ease of Installation - 3
     Final Product - 3


Basically the steps are as follows:

  1. Remove the old bumper - be sure to unplug the wiring harness for the fog lights on the passenger side (frame rail where the bumper joins the frame)
  2. Separate the inner part of the old bumper to remove the fog lights and the wiring harness for reuse on the LOD bumper
  3. Next I removed the frame cross member that ties the two sides together
  4. I then installed the fog lights into the mounts on the new bumper and ran the old wiring harness to connect them
  5. The next step is to mount the two frame brackets with the spacers so you can install the winch plate. This is a relative easy step but takes a little "magic" to align everything and have it remain in place while you fit the winch plate and secure it. Extra hands help! This is also where the directions became a bit "loose". Additionally in the pictures it shows what looks to be grade 8 bolts but what I got in my parts box looks like grade 5.
  6. Once you have all 8 bolts in place, you can test fit the front bumper. Use a nut on each side to help secure it while you are working.
  7. Once everything looks good, you can tighten down the bolts and connect the wiring harness back up for the fog lights.
  8. Next step is to install the winch (if you have one). This is pretty simple with just four bolts to secure it to the bottom of the winch plate and then wire it up.
  9. Last step is to install the skid plate underneath the bumper and running to the cross member. This was five bolts, three in front and two in the rear and everything was done!

I like the look of the new bumper and love having my winch mounted up again. This bumper looks very well made and I like the powder coat they used. It is slightly glossy but not "shiny" and looks like it will last. The only caution I have is that this Shorty bumper combines a recessed winch mount AND the fog lights and if you have been shopping for bumpers you know this is a tough combination. The fog lights sit in front of the winch so it extends the front of the bumper out a bit. I knew this going in and accepted the trade off, make sure it works for you before you buy it. With the winch fairlead, this sticks out even more. I have already ordered a new synthetic winch line and hawse failrlead so I will be able to reduce the weight and length somewhat. I will post new pictures when they are installed.


The Journey is what counts, Adventure Awaits!

Falcon Nexus EF 2.2 Steering Stabilizer Install

I should have written this last week but life got in the way, I am sure you can all relate...

Two weekends ago, I headed over to Chris' house and we set about installing the new Falcon Steering Stabilizer, front LOD Stubby bumper, skid plate and associated lights and winch! It was about 2-3 hours worth of effort combined and I think it went pretty well.

Scoring for this install comes out to a 13 out of 15 so pretty great:

     Price - 1 ($332.49)
     Completeness of Directions - 3
     Completeness of parts/materials - 3
     Ease of Installation - 3
     Final Product - 3


First up was the FALCON NEXUS EF 2.2 FAST ADJUST Steering Stabilizer from Teraflex and it was a fast and easy install. This is my first Teraflex product but if it is any indication of the quality and future longevity of their products, I am very impressed. My initial reaction is that I really liked the look and feel of the product.  The installation included everything required and was a picture on the inside of the box! There are several instructional videos online as well but you really don't need them. The picture was enough! You start out by removing the factory steering stabilizer:

  1. Remove the tracbar bolt on the passenger side
  2. Remove the two factory bolts that connect the old steering stabilizer to the tie rod (Turn the steering wheel fully to the right to allow the bolts to slide out from the top)
  3. Next remove the three bolts that connect the old steering stabilizer to the axle
  4. Remove the remaining factory bolt that connects the old steering stabilizer to the tie rod bracket and save it for reuse
  5. Install the Falcon Steering Stabilizer to the axle using the factory hardware and torque to 30 ft pounds
  6. Insert a provided carriage bolt into the new top bracket and spacer
  7. Install it on top of the tie rod bracket and insert another carriage bolt
  8. Put the bottom bracket into position and install the two nuts
  9. Using the factory bolt that you saved from step 4, install the bolt into the remaining hole in the mounting bracket attaching the steering stabilizer in the process
  10. Tighten all three of these nuts to 59 foot pounds
  11. That's it, Go for a Drive!
I think short of a light, this is the easiest thing I have installed to date on any of my Jeeps. You can also notice the difference immediately, the settings are as follows:
  • Soft, intended for off-road and rock crawling, gives you really good feel
  • Medium, intended for normal driving and some trails, feels more "responsive"
  • Firm, intended for highway driving, is very "tight" as it's name implies
I drove it around for the past two weeks trying out each setting and settled on Medium for the daily driver chores. Saturday I leave for Florida and plan to set it to Firm for the long ride down. When I hit the trials next, I will give Soft a try to get a really good feel for the differences.

The Journey is what counts, Adventure Awaits!

Friday, March 1, 2019

Plans for the weekend...

In my previous post, I shared that I was quite excited last week to take delivery of my new bumper only to be disappointed when only the skid plate showed up. Fast forward to today and I have received the bumper and also my Alien Sunshade.

Test Fit everything on my kitchen table - I have a great wife!

Tomorrow I am hoping to get it all installed. Plans include (in order of importance):

  • Help my buddy install new wheel bearings on his truck
  • Remove JL Bumper
  • Remove JL stock Steering Stabilizer
  • Install Falcon Nexus Steering Stabilizer
  • Install LOD Bumper
  • Re-install my SmittyBilt Winch
  • Install LOD Bumper Skid Plate
If I can get all this done, it will be a great day! I am not sure I can get the weather to cooperate but going to give it a try, my kingdom for a heated garage!

Hopefully, my next posts will be installation reviews for the above...

The Journey is what counts, Adventure Awaits!

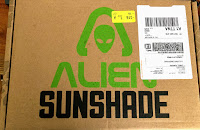
Well Packaged - Alien Sunshade

I just received my order from Alien Sunshade for my new sun shade for the JL. Nothing too awesome in that except for the fact that it was one of the first things I have received in quite a while that was packaged really well. I am a little "sensitive" to this as I also received my new bumper this week and it was a bit different...

Now I realize that a bumper is quite a bit heavier than the sun shade is but with everything we order for our Jeeps, you would think they could do a better job on shipping. The bumper was packed in an appropriately sized box but they used spray foam to surround the bumper which led to two things:

  • It was a mess, not quite as bad as packaging peanuts but a pain in the ass to open and dispose of.
  • The two points on the bumper pushed easily through the spray foam and the box to protrude through the cardboard
To add to the issue, the bumper is about 75 pounds so the FedEx driver decided that dragging it on end to my door was better than carrying it! Needless to say, I had to paint to two ends of my brand new bumper to cover up all the scratches. Luckily there was no damage to the bumper and the scratches were superficial so it was not worth sending it back or making a big deal about it.

Today, as comparison, I received the box from Alien and it was packed really well without any mess and seems to be mostly recyclable.


It's not a big deal but when I opened up the box, it just seemed like whomever packed it really knew what they were doing and cared to make sure it looked great inside and out. By contract, the bumper showed up in decent shape but scratched and in a package that my recycling garbage men will not take so it all goes to the dump.

Either way, I am really excited to "install" both this weekend and hopefully grab some time to also get my Falcon Nexus steering stabilizer in as well.

The Journey is what counts, Adventure Awaits!