I just got back from my work trip to RTP and finished the 935 mile round trip journey averaging 24 MPG!!! I am really excited about how well the JL Rubicon handles on the road and sips fuel (well at least for a Jeep)!
So the 75 degree weather I was experiencing in NC, inspired me to take on a small project when I got home. It was much colder up here in NJ but still sunny out so I figured I would get something done. I installed some lights on my A-Pillars that I purchased from Amazon.com pretty cheaply. They are not what I plan to keep on the Jeep but for the price it was worth it. I had already ordered the KC HiLites 7318 Jeep JL Wrangler A-Pillar Light Brackets (also from Amazon.com) so I was anxious to start.
What you will need:
So these lights come with two modes and three wires, a RED "Power" wire for the white LEDs, a WHITE "Power" wire for the blue markers, and a BLACK negative wire for grounding. You need to figure out how you want the lights to work, wiring the red and white together to the same power wire will result in these two lights switch on together without any control over individual lights. If you wire them separately to different power wires then you need to have multiple switches to turn them on and off. You just need to decide what works best for you. I decided to wire the Blue marker lights into my Bus Bar that I installed a few weeks ago for my KC HiLites Cyclone Rock Lights. This means that they will illuminate when I hit the Rock Light Switch (Aux 4) inside my Jeep. I did this as I am not sure I will be keeping these specific lights long and I did not want to waste another switch until I figure out my real plan. I wired the White LEDs to the Orange/Purple power wire under my hood so I could utilize the "Aux 3" switch inside the Jeep for those lights. I wired the Black common ground to the same grounding point I used for the rock lights under the hood. All in all, this is a very simple install if you are decent with wiring and just slightly mechanically inclined.
 |
| pre-light install but in need of a wash from all the Road Salt |
The KC HiLites light mount bracket is a sturdy little mount that is much nicer than the ones I had for my JK. I like they way these fit better. You have the plate itself that you mount the light to, a spacer that goes under the plate and the replacement bolt and washer that run through the plate, spacer and into the cowl.
Start by removing the windshield hinge bolt with the T45 Torx and then the cowl bolt closest to the windshield with a T40 Torx. You will need to actually remove the entire cowl body panels if you want to hide the wires underneath (which is what I did) so you can just remove all four bolts with the T40 Torx at this point. After the bolts are out, you can drop the spacer into place in the closest hole.
The plate mounts using the windshield bolt and the supplied bolt (you do not need the one you took out of the cowl so save that in your parts bin). At this point I just mounted it loosely so you could see it for the pictures but I did not screw it down as you need to still pull the sides of the cowl for the wires.
To mount the lights, I grabbed two suitable washers from my parts bin (always good to have a parts bin) as the washers that come with these particular lights are only lock washers and they were too small to work with the slot on the mounting plate. Using these fender washers allowed me to tighten down the nut and the lock washer properly without any issues.


Once I had the lights mounted, I began to wire them up. You will need to extend the wires so they can reach the other side of the Jeep (or wherever you are running your power from). As I said, I used the wiring from my rock lights for the marker light and the Aux 3 switch wire and both of those are on the passenger side right near the battery. This picture is of the driver side so once I spliced in and heat shrunk the connectors, I ran the wiring across the back of the engine compartment and zip-tied them up and out of the way. It looks better and is much more organized than just trying to tuck the wires somewhere plus with them zip-tied together, it is easy for me to figure out what wires are what when I do my next project down the road.


The green wire you see in the picture is the power wire for the marker lights and this is the Bus Bar from my rock lights so it was and easy connection to wire those up. The red wire leads to the power wire for the Aux 3 switch so that was also a quick connection. The final step was to wire up the common ground to the bolts just above and to the right of the Bus Bar in the picture. I like using these as they as used by the factory for the same purpose and there is no paint so you get a great ground from them. Figure if the factory did it that way then it is a safe bet it will work well.
Definitely an easy install that should not run you more than an hour tops. I am still looking for better lights like the
KC HiLites 300 Driving Lights or the
KC HiLiTES 268 Flex LED Dual, the
Baja Designs 55-57815 Amber Squadron Lights, or possibly the
Sylvania - Cube-X LED Off Road Lights. What I would really prefer if for KC HiLights to make a 3-4 inch version of my
KC HiLites 653 Gravity G6 lights so I could have a matching set on the bumper and the A-Pillars! I can dream can't I??? Oh well, these will work fine for now and I will keep playing the lottery to fund something else...
The Journey is what counts, Adventure Awaits!
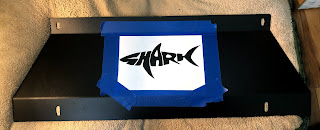
 Once it was dry enough, I brought it inside the house to finish drying as it's really too cold outside right now. As you can see, my stencil failed in places so once it is all dry and set, most likely tomorrow, I will go over it with black paint to sharpen the blur. I will do this with a brush so I have more control. All in all, it made the missing bumper sting just a bit less, can't wait to show you everything installed and ready for the trails!


