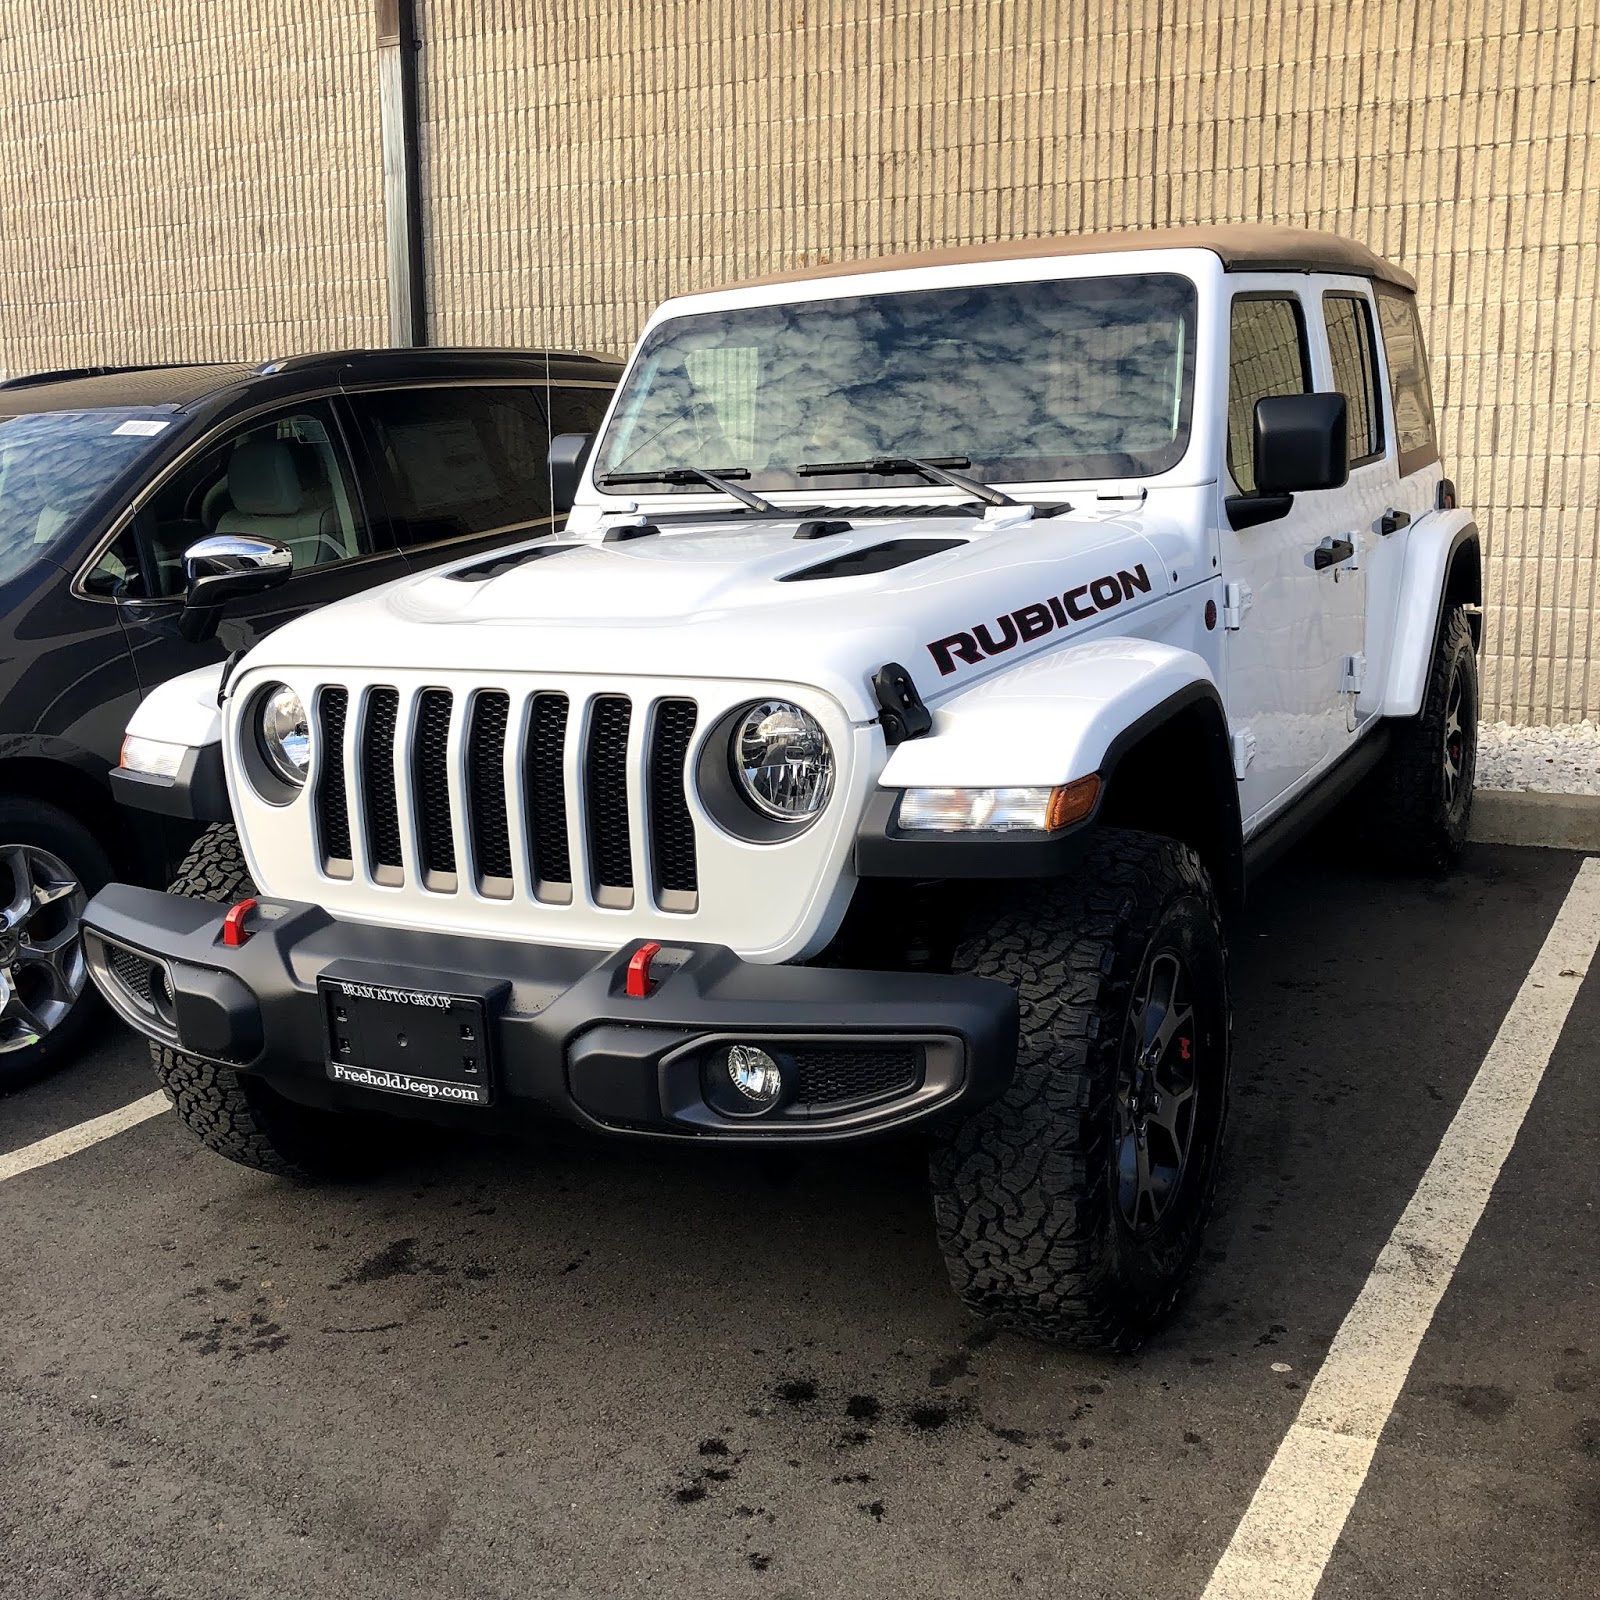
Monday, January 28, 2019

The Bumper Search Continues...

After many weeks of an exhaustive web search, I am still no closer to finding a set of bumpers for my JL. Here is the list of all the vendors I have searched through and while some have risen to the top, none have come out as a clear leader.

  • ARB (delayed the Bondi bumper)
  • AEV (no word on timing for their SEMA stubby)
  • Artec (strong contender but would prefer a bull bar over a stinger)
  • VKS (does not produce recessed & fog lights - but really great customer service)
  • HiLine (did not find one I liked)
  • JCR (strong contender - Great Rear bumper - square fog hole lights)
  • Poison Spyder (rear bumper has it's own hitch - square lights on front bumper - really like their finish)
  • Full Metal Fabworks (still working on their JL bumpers)
  • CrawlTek
  • LOD (many options)
  • Expedition One
  • Hauk Offroad (really cool but got Very expensive as I configured them)
  • Hammerhead
  • DV8
  • Ace Engineering (really liked these but their bull bar is huge)
  • Motobilt (also a very strong contender - still considering)
  • Metalcloak (interesting version and very modular)
  • Go Rhino
  • Rugged Ridge
  • Smittybilt
  • etc...
Suffice it to say that there are many vendors out there producing JL bumpers. This gets even crazier if you search on eBay and Amazon and start counting all the off-brand versions out there.

Many of these bumpers are very close to what I want and frankly, the issue is more with me than any of these individually. I was hoping for a few items in the front bumper and rear bumper. Let's start with the rear:
  1. Full coverage
  2. Tow points
  3. Ability to work with factory hitch
  4. License plate mount that does not interfere with backup camera
For the front bumper, I was looking for:
  1. Mid-width or stubby
  2. Use of factory fog lights
  3. Recessed winch mount
  4. Tow points
  5. License plate mount (I live in NJ so require front and back plates)
In general, I am not a huge fan of the heavily textured finishes and really like the Poison Spyder coating they use.

What I have seen is that most of the rear bumpers do not have the license plates factored in and expect it to be moved to either the tire or similar location if you don't run a spare. This might be fine for a more dedicated rock crawler but on a dual purpose, daily driver, having my spare tire with functioning backup camera and a place for the license plate is more practical. There are several bumpers that can work here so I have been holding off on pulling the trigger because I like to match my front and rear bumpers.

So for the front bumpers, the search has been harder. I understand that there are always trade-offs with form and function but I still believe that I will find one somewhere that meets all or at least most of my requirements. The fog lights and the recessed winch bumper seem to be the "sticking" point for any stubby bumper just because of the space issues with fitting everything in the same space. I might just move up to a mid-width that has both but is a bit heavier (and this might be my best option).

Anyway, I just wanted to provide an update on what's been going on. I have also been working on mounting my antennas for the CB and GMRS radios and this has also taken more effort than I expected. One big issue is that the JL is really limited on places to mount magnetic base antennas with all the aluminum in use to cut the weight. I have also picked up a 5th Cyclone rock light for the front and will be installing that once I get some decent weather.

Was hoping to be able to show you my newly mounted bumpers by now but the search is still on...


The Journey is what counts, Adventure Awaits!

Sunday, January 13, 2019

Stickers, stickers and more stickers...sometimes

We in the Jeep community really like our stickers, we display them like badges of honor. Some

represent the products that have gone into our builds, others the places we have visited, and the organizations we belong to. Each of us had our own reasons for displaying them proudly as well as our favorite locations on the vehicle.

On my last Jeep, INCUS, I only put stickers onto my JK that I had specifically installed somewhere on it. I used the space opposite the license plate on the rear passenger side for most. I applied a couple to my soft top and one other (AEV) to the body because they were the lift I installed and i really liked their color/logo with the bull.

As I start on my new JL build, I started thinking about where to install my new stickers and found myself not wanting to clutter up the Jeep's body with too many so I need to find a new option/location. The search is on...

I also took a look at some of the first items I have installed and noticed something interesting, some vendors do not include any stickers, others one or two, and some give you an entire sheet along with patches! Seems a bit all over the top so I wanted to see why the differences? For the manufacturer, there is definitely a cost to printing but that must be offset somewhat by the "free" advertising they receive having their logos prominently on display on Jeeps everywhere. For the Jeep owner, there is the feeling of pride and some individuality in displaying what went into your build and how you personalized it.


Price does not seem to be a factor. I purchased my $1700 Rock Slide Engineering Step/Sliders and they were delivered without any stickers at all, my $300 Falcon Nexus Steering Stabilizer came with a sheet of stickers (Thank you) that have a few sizes to choose from, and my KC HiLites came with their traditional black and yellow stickers.

Obviously, this is not a deal breaker in anyway, I will still purchase a product regardless of the number or type of stickers that are included in the packaging, but I am just curious why some vendors make it such an important part of their material and others seem to pay it little attention. After all, they are basically being paid (when we purchase the products) to display their logos (stickers and patches) on their customers Jeeps and then have those Jeeps driven all over the world. It seems like a "no-brainer" marketing 101 to me. Why would you not take advantage of this?

Oh well, we may never know (or really care) the truth so now I will return to trying to figure out the best locations for my decals and patches. Honestly, I am starting to really like the patches more because I can easily put in a small piece of Velcro and attach the patches to it. This also allows me to switch them out/around as I need/want to. Decisions, decisions... I think for Great White the Jeep, I will put the stickers on my tool box that I always carry with me and install a Velcro strip for the patches across the back inside the Jeep. Once I upgrade the bumpers and suspension, then I will have a few more places to work with. Just not wanting to put too much on that pretty white paint!

Where do you prefer to display the vendors you support? What do you think is a great way for vendors to get their names out?

The Journey is what counts, Adventure Awaits!

Friday, January 11, 2019

1st Jeep Jamboree for Me!

So I am pretty excited to let you know that my friend Chris and I will be participating in our first ever Jeep Jamboree this coming May! We signed up for the Spring Coal Mountain Jeep Jamboree located at the Anthracite Outdoor Adventure Area (AOAA). I wanted to share this trip with you when I signed up back in November but it was birthday gift from Chris's family so I had to keep my mouth shut all this time! Thankfully, his birthday was Jan 5th so I can finally talk about it.
It runs from May 2nd (check-in) through May 4th with wheeling done on Friday and Saturday. I am trying to secure a camp ground for this trip and probably should have done so sooner as they are all booked up or a longer drive in, each morning. Ehh, I will figure something out.

This trip consists of both sides of the property and here is a description from the Jeep Jamboree website of the trails:
West Side HO–BD Highway • Rating 2–4 This trail ride gives a great overview of the west property that includes mud, rocks, and coal dirt along with scenic overlooks such as “The Caves Overlook” and “The Whaleback”. We may also encounter active mining near the “Fan House”. There is a wide variety of terrain from forest trails that highlight the region’s coal mining history, up and down hills, mud and water pits, tight tree sections, and a rocky creek bottom in the “Little Rock Creek” area. 
West Side Coal Crackers • Rating 4–6 We start with a little loop to get you back in off-road mode, then we travel through the woods to tackle the tight and winding Potato Chip Hill. Close your eyes and scream as we go over Roller-Coaster Hill. Head back up the Dozer Cut on your way to Fern Ridge. Start with the rocky, non-stop Fern Ridge Challenge then original Fern Ridge Trail with an optional drop into the Fern Ridge Hole, climbing out will challenge both driver and Jeep! On to the Trench and the Fern Ridge Extension. 
West Side Kyle’s Follies • Rating 4–6 Anybody’s guess. With numerous new trails being developed this winter expect new stuff! Trail Guides will be bulldogging you along a wide variety of trail conditions to see if you’re ready for our Darker Blue Trails. Only our surveys will reveal what it really is. Although Trail Leader, Kyle Buchter, has been running a lot of 101 & 201 trail rides we know he’s got a darker side.
West Side – Breaker Boys • Rating 7–8 Big Boy rock garden early into the newer section. Then to rockface outlook and up a rocky hill that travels to Kutch’s Krack (see Mike Kutch for that story) and Fern Ridge east with numerous Rock garden loops. Hit the NJ Trench downhill & out to the “Stairway to Heaven” then east bound on West Fern Ridge with a hill rock garden with several different lines. You pick it!
East Side Mud Mining • Rating 2–4 This will cover a large portion of the east side property. If you are looking for something scenic and historic this is your trail. It includes tight trails that test your driving ability as well as hill ascents, hill descents, rocks (you are in coal country after all), off camber obstacles, and some mud if mother nature cooperates
East Side East Bound and Down • Rating 5–7 Travel along the pole line with up and down hill climbs and ravines as you make your way to The Point. Then it’s onto Upper Anthracite downhill. Challenge both yourself and your Jeep on Barney Rubble’s uphill rock climb.
East Side AAA • Ratings 6–8 Loop in and out of the trees, discovering rocky washout hill climbs and descents along the way. Begin challenging yourself in Green Briar, a looping twisting rock garden ending in a gulley that’ll put your front tires in the air. Push yourself by completing Upper Anthracite, working your way down the usually dry creek bed. Finally, test your Jeep’s limits on Barney Rubble, the rocky uphill climb that now features a downhill side that may be even more technical than it appears.
East Side Rock and Rumble • Rating 8–9 Travel the same lines the 2018 Ultimate Adventure Traveled! Rocks, rocks and more rocks! Warm up with Barney Rubble then into Bam-Bam onto Thunder Alley. Then it’s onto M Trail, and pending vehicles & conditions “Screaming Jimmy Hill”….Winch points await you! Next it’s “B Line” with numerous rock sections including The BIG UGLY which is always changing to test driver & Jeep. For more we wrap things up with Lower & Upper Anthracite. 
Now I need to get all my upgrades installed pretty quick!

I am really looking forward to this trip and suggest, if you want to take on a Jeep Jamboree, find a local one and sign up, they sell out quick.
The Journey is what counts, Adventure Awaits!

Tuesday, January 8, 2019

Two Week Review - 2019 Jep JLU Rubicon

So I have about 2 weeks worth of experience with my JL and wanted to provide my view of it so far. Just as a refresher, this comparison is based on my 2014 JKU Sport S since that was the last Jeep that I had driven.

The Good:

  1. The 2.0-Liter I4 DOHC DI Turbo eTorque Engine has been pretty awesome. I am averaging about 19 miles per gallon (2nd tank of gas) when compared to about 14 on my JK both running 33 inch tires and 4.10 gears. I do not drive fast so the Start/Stop function does not bother me at all. It took a few days to get used to it but now I barely notice it. Passengers still do notice it so there is definitely a lag/delay but nothing that bothers me. Power seems pretty smooth throughout normal driving speeds and I have no problem passing someone on the highway when I need to or accelerating onto a road. The first week of February, I will be driving down to NC so I will get some real world data on a longer trip. Still have not had it off-road but my club has a trip coming up mid-January so I can hopefully make that one.
  2. The 8-Speed Automatic Transmission seems to be fitted up very well to this new engine and shifts very smoothly.
  3. The Uconnect® 4C NAV with 8.4-Inch Display is pretty awesome. One of my biggest issues with the JK was how poor the radio sounded (I had the base system but had upgraded the speakers twice). This one works really well and sounds great. Even the Navigation works great when compared to my wife's 2015 Grand Cherokee or my portable Garmin. Also really happy with how easy it is to pair multiple cell phones and choose between them.
  4. Heritage Tan Leather Seats - Very comfortable and look great! The heated seat function gives you 3 settings to choose from and all are more than enough. The big winner is the heated steering wheel, that is just amazing!
  5. Trailer Towing Option - I love the 4 Auxiliary Switches and they are very convenient to utilize. I connected my rock lights up to one and plan to use another for my CB and GMRS radios. 2 of the switches are 40 amp and always available and the other 2 are 15 amp but require the engine to be running. I also love that you can customize how they function (momentary verse on/off). Have not pulled the trailer with the Jeep yet but will try it out in the spring.
  6. Overall fit and finish is way ahead of what my 2014 JK had.
The Bad:
  1. Huge level of complexity in an off-road vehicle but I have not had (knock on wood) any issues. I did purchase an extended warranty as the 2nd battery system scares me a bit.
Last bit of commentary and some background...
My original plan was to keep my JK until the Gladiator launched but as the date continued to slip out, I started to really want the JL. I really liked the changes I was seeing and I wanted to upgrade to the Rubicon model. I had jokingly told my wife on many occasions that we would trade her Grand Cherokee in for the Gladiator and this way I could have both! She would use the Gladiator for her daily commuter but this plan really never went over well and was a "pipe dream" of mine. Fast forward to about a week ago and her first time driving the JL, she really liked it to the point where she mentioned that she might not mind driving it for her daily driver! This has got to be one of the best "compliments" for the JL Rubicon engineers when you consider the fit, finish, and on-road manners the new JL has. Today she asked to drive it to work and when she got there, I got an IM that said "Jeep drives really nice"... GLADIATOR here I come!!!
 The Journey is what counts, Adventure Awaits!

Friday, January 4, 2019

KC HiLites Cyclone Rock Light Install

I finally got some time to do the install and I will try to highlight for you what went well, what I had to modify, and what might still need some work. I think I will also start an installation ratings system based on a few criteria that I can use going forward for future upgrades. The main criteria I will focus on will be:
  1. Price
  2. Completeness of Directions
  3. Completeness of parts/materials
  4. Ease of Installation
  5. Final Product
I will use a simple 3 point scale where 1 is the lowest score and 3 is the best. I don't think it needs to be much more complicated than that.

So for my first scoring on the KC HiLites Cyclone 4 Piece Rock Light Kit:
  1. Price - 1 ($226.99)
  2. Completeness of Directions - 3
  3. Completeness of parts/materials - 3
  4. Ease of Installation - 3
  5. Final Product - 3
Grand total of a 13 for this kit! Now let's get into the install... I want to point out that the install is for a Jeep with standard Rubi Rails from the factory or steps. My Rock Slide Engineering steps that I installed last week were a bit different from a mounting perspective so I needed to grind down part of the step mount that is not normally present on the factory steps. I did not count this as an issue for the light install.

Step 1: Install the Busbar - I like Busbars as they make for a nice clean install and allow for me to easily upgrade to additional lights in the future. It is a four inch bar that you mount relatively close to the battery and a common ground. I mounted mine close to the battery but up out of the way (see picture for details).

Step 2: Installation of the 4 Cyclone Rock Lights - In the directions it tells you to mount them to the hardware for the Rubi Rails but as you are aware, I have already replaced those and I mounted them in a slightly different spot using the brackets that KC provided with the lights.

Step 3: Driver Side Wiring Harness - This is a straightforward run from the Busbar, across the firewall and down to the frame rail on the driver side. I used zip ties to secure it along the way and connected the Cyclone lights to the wiring harness using the supplied bullet connectors. KC nicely added in extensions that you can use if you need a little extra length to get from the light mount over to the wiring harness. I had to on the driver side as I needed about 2 additional inches and it worked out fine.

Step 4: Passenger Side Wiring Harness - This is the same deal as the Driver side only running down the passenger side of the vehicle to your Cyclone Lights. Only really important item to remember here is to make sure you zip tie the harness up and out of the way from anything that might snag it off-road or and heat source that could melt it. I did not need to extend the wires on the passenger side as there was ample wire in the harness itself.

Step 5: Switch Harness Installation - This is where I deviated from the KC provided install instructions. Since I wanted to use one of the Auxiliary switches already installed in my JL, I took a look at the following detail from the owners manual and located the wires near the battery under the hood. I utilized the Dark Blue/Pink wire which has a 15 amp fuse for my power source  (this is the Aux 4 Switch). I extended and ran this wire to the Busbar where the instructions called for the Green Wire from the KC wiring Harness to go. Since this is already a fused switch, I did not need to do anything else.

That's about it! This was a really easy install for anyone who has ever wired a light before. I would say that this took me about 1.5 hours to install. The finished product looks great and I can't wait to see how it functions off-road. To be honest, these are more for looks so I am not too worried about it off-road but if they provide a good light then it's a bonus. The wiring harness was pre-configured to add in additional rear lights (connector located on the Passenger side Wiring Harness) so I might tackle that next if I find I need/want more light...

The Journey is what counts, Adventure Awaits!

New Year, New Delivery...

Before I traded in my JK for the JL, I pulled off all the extra items that I had installed over the years that the dealership did not care about. Some of these items I saved for the JL, but for anything that would not fit, I tried to sell. I sold off my tube doors and used the money to purchase new KC Cyclone Rock Lights. These are something that I had wanted for a while on my JK so figured I would get a jump on them with my JL build.

I still love seeing the Brown trucks roll up outside to drop off a delivery... I ordered these from Quadratec and took advantage of one of their after Christmas sales and saved about 15%.

I had a set of cheap rock lights on my JK but I really liked the look of the Cyclone lights so figured this was a great time for an upgrade. I will try to get them installed this weekend and will post an update once completed but here is what they look like out of the box. I purchased the 4 light set figuring I could add on if I need to later. I also chose the Amber lights and I think that will both complement the Jeep the best and provide a nice functional light off-road.


I plan to use one of the Auxiliary switches that came optional in the JL. From what I can see and read, they are pretty configurable so I think this will be a good use for one of them. Stay Tuned for the install...

The Journey is what counts, Adventure Awaits!

Thursday, January 3, 2019

Some Smaller Adds to my Jeep JL over the Holiday Break

I have been featuring the RSE Step/Sliders and the Teraflex Falcon Nexus Steering Stabilizer (yet to be installed) but I have also been busy with some "smaller" modifications just to make the JL more comfortable/functional.

I have installed:

I still need to figure out exactly where I will mount some of the items but all the wiring is in place and everything can be used once I figure out the best places to mount the radios. I found it extremely hard to drill any holes into my brand new JL dash. It's, frankly, too pretty!

I also still need to run the antennas out the back but ran into one problem, there is not much actual steel out the back of my Jeep! The GMRS radio has a magnetic mount and the bumper is plastic (for now) and everything on the tailgate is either Aluminum or Plastic so no options there either. Once I upgrade the rear bumper, then I will permanently mount the antennas.


More changes to come as time and finances permit...

The Journey is what counts, Adventure Awaits!

Tuesday, January 1, 2019

Happy New Year!!!

Just a quick post to wish you all a very Happy, Healthy, and Prosperous New Year. 2018 was a great year for me and I am looking for more of the same in 2019!

Attitude is what gets you out of bed each day and lets you choose to have a good day or a bad day - always opt for the Good Days! I am a firm believer in positive thinking and not because it holds some sort of mystical powers but because I feel people in general prefer to associate with positive thinkers. It opens you up to many more new opportunities than if i you approach your day from a negative perspective.

Choose to be positive and more than not, good things will be made available to you. Make sure that you take full advantage of the opportunities when presented because they will not stick around too long.

Anyway, off my soap box and back outside...I installed LED lights for my RSE Step/Sliders and wired up my brake controller, last thing on my list is installing my Midland MTX275 Radio.

The Journey is what counts, Adventure Awaits!

Sunday, December 30, 2018

Rock Slide Engineering Step Sliders - Install & First Impressions...

So yesterday, my buddy and I, along with some help from his son, installed my Rock Slide Engineering Step/Sliders on Great White the Jeep (as I think she will be known hence forward). The mechanical aspects of the install were quite easy. There are detailed instructions on their website and some great YouTube Videos that highlight the install so I will focus on what we ran into and how we approached it.

First Impressions:

  • Very well made and the powder coat was perfect
  • Very well packaged for shipment - arrived with no issues
  • The wiring harness was perfectly laid out and designed
  • Truly drill free with out needing to modify anything on my JL or the Steps
  • Very nice fit on a factory level
  • They need to give you more two sided tape (see below)
  • Expensive but would definitely purchase again for another vehicle

What We installed:
  • JL UNLIMITED 4 DOOR STEP SLIDERS - BD-SS-200-JL4
Options Not Installed:
  • JL STEP-SLIDER SKID PLATE - AX-SS-SP-JL4
  • JL ROCKER GUARD - AX-SS-RG-JL4
  • STEP SLIDER LIGHT KIT - SL-LK-LED

Basically, we uninstalled my factory Rubi Rails and set those aside, on a 3 day old Jeep, things were  nice and clean and nothing was rusted on so that was a first! With that complete, we installed three brackets on each side and were then ready to install the trim piece that protects the body from the step itself and from bumps. These were affixed with automotive tape and were a really nice touch.
Once we had the strips up, we were able to test fit the steps and they are heavy! Much beefier than the DV8 steps I had on my JK. These claim to be functioning rails (they also have an optional skid plate) and it was clear that they are made much better than my previous ones. I think they could definitely survive minor bumps and bruises on the trail without much issue. Not sure they are really up for rock crawling but then again, neither am I.

After we test fit the steps, there was really no reason not to mount them fully as they fit perfectly. With all the mechanical parts of the install completed, it was time for electrical. Now my buddy Chris is the mechanical guy and I am the electrical guy, and between us, we do a pretty decent job. We bounce things off each other, along with his son Mitch, and can figure out most everything we have tried. These steps come with a very well made wiring harness and you start from the engine bay (battery) and work your way backwards to the rear seats where all the major install happens.

First, make sure you pull the blade fuse that is inside the red wire that you will be attaching to the battery's red terminal before you start. It is called out in the directions but I feel it is worth repeating here. Once that is done, go ahead and wire up the red and black wires to the red and black battery terminals and that step is complete. Run the wiring up and across the engine compartment and over to the drivers side just past the brake cylinder. There is a grommet here that lets you pass the wiring through the firewall very nicely. I removed the grommet and drilled a hole in it large enough to allow me to pass the wire with their connectors through, and then reinstalled the grommet. I used cable ties and the little square cable tie holders to secure the wire harness within the engine bay so everything was neatly run and out of the way.

Once through the firewall, I connected the first part of the wiring harness to the main section where all the sensors and "brain" resides. Then I installed the on/off switch under the dash as described in the instructions with one small deviation. I forgot my "Righty Tighty/Lefty Loosey" rule of thumb and broke the tiny little bolt that holds the ODB connector which is used to also mount the on/off switch. Chris spent the better part of an hour backing it out with vise grips and re-connecting with a nut and bolt (Wasted Time as it was too early for a beer at that point).  Next you need to remove the inside trim along the body under the doors, front and back, left and right, and move carpet in several spots. This is mostly where the cursing took place. There are two plastic "plugs" (NOT the DRAIN PLUGS) on each side of the back seat floor that need to be removed and modified/cut to allow the power wires for the step motors and optional lighting to pass through the floor and under the Jeep to connect power to the steps and lights (pretty logical).

I would say that the next part, lining up the sensors and magnets, is what took the longest, but mostly because of me. They give you exactly 8 small foam, half inch square, two sided tape "pads"that you use for each of the four magnets and each of the four sensors. I mistakenly used two on the first sensor because it seemed too "loose" with only one and this came back to haunt me big time. I did the drivers side first and got everything lined up well and then moved onto the passenger side. As you may have guessed, I had run out of the two sided tape before I could affix my last magnet on the rear passenger door so I just "placed" it in position. I put the fuse back into the wiring harness up near the battery for the first time and the motors cycle. Everything worked great until I tried the rear passenger door, that magnet shifted and nothing would work. It went back and forth like this for a while. I could get everything working, then I would mess up the rear sensor and then it would screw up. I had to keep pulling and replacing the fuse to recycle the motor. After a while I decided I would give up until  I got another piece of the two sided tape.

Long story short, (I know, too late) and that was the issue. Once I mounted the last magnet with the two sided tape so it was held in the proper place, the steps worked and continue to work like a charm. Moral to the story, buy extra two sided tape or "Trust" that what they supplied you is enough!

I can't wait to update you after I have had these on Great White for a bit, but I am really happy with them so far, as is my wife, and you know what they say, "a Happy Wife makes for a Happy Life"!

The Journey is what counts, Adventure Awaits!


Friday, December 28, 2018

Merry Christmas to ME! My JL has Arrived!

About noon yesterday I got the call that I have been awaiting since November 8th when I ordered my new JL! Mike from Freehold Jeep called (and sent a text) to let me know that my baby just showed up! What a Happy Day! My wife and I dropped everything and headed right over to the dealership. Boy was she pretty sitting there all shiny and new!
2019 Jeep JL Rubicon (GreatWhite for short)
So for first impressions... I love it! The color scheme is perfect if I do say so myself. The Heritage Tan leather with the Premium Tan top look awesome together against the White JL. The interior is an amazing step up from my older JK and the comfort factor was Amp'd way up. Now, to be fair, I am comparing it against my 2014 Sport S so there was quite difference in trim levels already. I have not had too much of an opportunity to play with it so I really can't comment on off-road capabilities but the on road handling is markedly better than what I had.
Old and New
Anyway, much more to come as I get deeper into the build (which begins this Saturday). I will post the install for the RSE Step/Sliders and the Teraflex Steering Stabilizer over the next few days.

Lastly, I also wanted to share my review of the dealership where I purchased GreatWhiteTheJeep from:

On November 8th, I ordered a 2019 Jeep JL Rubicon from Mike Youssef at Freehold Jeep. This was the first car I have ever ordered directly from the factory and was a pretty large purchase. Mike and the team made sure I was well informed of the options and choices available to me and got me setup with exactly what I wanted. About 8 short weeks later, I got a call from Mike stating that my JL had arrived and a few hours later I was driving it away! They helped me out with my trade in vehicle and gave me what I feel was a very fair deal. I also want to acknowledge Matthew Miller for all the help he gave me along the weeks while I was waiting for delivery. I am not the most patient person but I never felt that Mike or Matthew did not have time for me. They quickly responded to all my emails, phone calls and text messages and made me feel like a valued customer. We will return when my wife's Grand Cherokee is up for trade in.

I would highly recommend (if you are in this area) checking them out...

 The Journey is what counts, Adventure Awaits!

Thursday, December 20, 2018

Down to the Wire!

So I received an email from my Jeep Dealership today stating that my JLU Rubicon will be there in a couple days! Wow, that is huge news for me, I was hoping that this would be a Christmas present (to myself) and now it looks like it might really work out. Still a little bit of a long shot but I am sending as many positive thoughts to the train and subsequent truck that will ultimately deliver my Jeep. Please avoid all storms and delays and drop my Jeep off before Christmas Day! If there was an appropriate dance to go along with my prayers, I'd be doing that too right now.

So now I have some planning to do...I have one more day left of work before I break for the Holidays and do not have to return to work until January 3rd! That should give me sufficient time to install the RSE Step/Sliders and the Teraflex Falcon Nexus Steering stabilizer provided my friend is not too busy and we have some decent weather. I would also love to take it wheeling over the break so I need to fit some "behind the wheel" time into the schedule and then there's going to be many hours just sitting in it with a stupid grin on my face, that should take the most time.
I got a survey to fill out from FCA the other day asking about my experience with Jeep Chat and specifically "Michelle" who helped me on one of my many requests for information. All in all, I think the chat was a positive experience and I would definitely use it again (when I order my Gladiator - don't tell my wife) but I thought of one major enhancement... PICTURES! Wouldn't it be awesome to receive pictures of your build along the way? It does not have to be too many shots but maybe 2-3, from each big milestone, maybe paint, interior, and it rolling off the line. You would think it would be easy enough to automate since they track these along the way by barcode. Once they hit a certain point, a digital camera snaps a quick picture and sends off an email to the lucky "soon to be" owner. It would definitely make me happy to get one in my email.

Not sure if this blog will ever become important enough for FCA to read so I am asking each of you to suggest this whenever you have a chance, maybe if they hear it from enough of us, they will think about it.

Now I need to get back to dreaming, I mean planning what to do first...

The Journey is what counts, Adventure Awaits!

Wednesday, December 19, 2018

Cool New (to me) Product Spotlight...

Okay, so I (like you) am always searching the web to find something new for my JL, that's what we do when we can't drive it. Since my JL is still sitting somewhere in a warehouse in Toledo, Ohio awaiting shipment, I have lots of time to google new parts (much to my wife's and our check account's horror).

I like to try and find new things that are not on every Jeep you see. On one of my recent searches for a new JL bumper, I came across Full Metal Fabworks out of Big Bear City, CA. I had never heard of them before so I spent some time on their website checking out all they have to offer. Sadly, they do not have many JL items yet but had quite a few JK parts that looked cool. I contacted FMF and Andrew replied the next day. I love the quick follow up and he indicated that they should start producing JL parts in the 2nd quarter of 2019 (so between April and June).

Now their bumpers are pretty cool and I liked the look but what I really fell in love with was their version of "tube doors". They call them the "ZSR Vertical Opening Trail Doors" and you need to check them out. They are a patent pending design and something really different. I have never seen a pair on a Jeep near me yet so that is pretty cool. They run about $1800 for a 4dr JK pair so they definitely don't fall into the "budget" category but sometimes I ignore the budget (shhh!). I need to find someone who has them and check them out in person. If any of you decide to purchase a set before I do or get to see them in person, please let me know what you think.

If you are in the market and you want something a little unique, these are worth a look...

The Journey is what counts, Adventure Awaits!

Tuesday, December 18, 2018

Just purchased Upgrade #2 - Teraflex's Falcon Nexus EF 2.2 Steering Stabilizer

I just ordered a Teraflex Falcon Nexus EF 2.2 Fast Adjust Steering Stabilizer for my JLUR! This seems to be an area of concern for many owners and an item that I planned to upgrade very shortly in the future so I figured I would head-off the situation.

I really like the design of this and the Fox 2.0 Performance Series ATS Steering Stabilizer but preferred the price on the Teraflex version more. I like the idea of the Fast Adjust options allowing you to easily select between three settings of firmness. One "softer" setting for off-road use, a "hybrid" or mid-level setting for mixed driving and a "firm" setting for highway use. It really gives you a great way to tailor your setup based on driving needs at that moment.

It looks to be an easy install as well but I will follow up more on that once I have tackled it. For any of you that are interested, the price I paid was $332.49 with free shipping. From the Teraflex website, here is there description:


Historically, universal shock absorbers and steering stabilizers have been adapted to fit many applications with minimal tuning. Falcon Shocks rewrites the book on damper development with these new shock absorbers and steering stabilizers that are engineered to meet the unique requirements of the JL Wrangler/JLU Wrangler Unlimited.

These Jeep-specific steering stabilizers deliver a properly weighted steering feel and consistent bi-directional turning for balanced and controlled side-to-side steering response and an equal return to center dynamics.

Built from the ground up with a focus on fitment and function, these Wrangler-specific Falcon Nexus EF (Equal Force) Steering Stabilizers deliver the best damping characteristics possible.

After a lengthy and painstaking development process, we have delivered these advanced shocks to the awaiting Jeep market.

The Journey is what counts, Adventure Awaits!